This blog is once again full so I am starting over with a brand new blog. I hope you will stop over there and bookmark it to visit instead of coming here. The new blog is call Stitched Memories in Time and I hope you will enjoy it...
Thank you so much for all your comments here on All My Scattering Moments. I have so appreciated the friendships that have come about through the blog. Those memories are carried over into my new blog hence the name Stitched Memories in Time.
Wednesday, June 13, 2012
Monday, June 11, 2012
Keeping warm on a cool summer's eve.....
The weather turned quite chilly again in Holland. We have even had a fire going in the wood stove in the evenings on and off. But I am warm regardless with my latest finish...

I wanted to dig into my rather large stash of yarn. I have really had a bad case of yarn greed since I started crocheting. At least this project helped out by plundering my stash for 19 skeins.
I wanted a delicate look so choose a pattern with the shell stitch but also made it look rustic with stripes of cream, light grey, beige and dark grey. I knew I would just have to keep going until I ran out of yarn and it happened faster than I had hoped when I ran out of dark grey. You see.....I hope it would become huge and I could use it on a double bed but instead it is a perfect size to snuggle up on the couch with. I am really pleased with it!

More finishes to come this week. One finish has to be kept secret. I finished a door hanger which is the theme this year for my quilt group's Christmas in July gift exchange. I just love it and hate to give it away which is a good sign. I cannot wait to have the party in July and see who gets it. I promise to share it with you then.
Friday, June 1, 2012
Of strawberries and stacks of projects.....
Back in April, Bep and I had our SAL day and finished our strawberry pincushions. These are pincushions that are specifically made for our quilting.
We sewed the strawberry shape and stuffed them. We added a crown made of wool felt cut to look as real as I could make it. We first pierced a kebab stick (Jos cut these to the size of a spool of thread for us) through the felt and well into the strawberry filling before tacking the crown here and there to the strawberry. The results is a pincushion which stands in the spool ready to hold any needles and pins as you quilt.

Our lunch theme this time was a typical Dutch sandwich (Bep made a "broodje gezond" which is tomato, cucumber, lettuce, boiled egg and cheese on a brown roll) and a typical American sandwich (I made a chicken club sandwich on ciabatta bread). We had our SAL day at Bep's this time due to the weather as she would have to bike to my house in the rain. Unfortunately, we had no SAL day in May since she is away on vacation. I missed our day as we have a fun new project to start on once again!
.jpg)
As you can see, I really do use my strawberry when I sit down to quilt. I am working this weekend on hand quilting a doll quilt. It is nice to be able to park my needle and know where I put it. *wink*

It has been a busy week sorting through UFOs in my quilt studio. I have been grouping them together according to stitching, quilting or finishing UFOs. I added a number to my list for my UFO challenge. It is time to get back on track with them instead of any new starts. And since I have just bought three fabulous charts from The Primitive Hare, I will have to cross off at least three UFOs quickly to be able to start on them. I finished one today and will share it in the next blog post.

It is hitting home that we are already into June and I did not keep my goal up of 2 UFOs a month. To date, I have completed 14 things this year but only 7 of them are from my UFO list. It is not easy to only work on UFOs so I am now going to be thrilled if I can keep one a month as a finish. Many of my projects just cannot be finished so quickly. I have had two people comment recently that my quilt studio is looking more bare so I know it is working to focus on these stacks.
Anyone else doing well with working through their UFOs this year? Do you find listing them and working through that list helps. Or do you just pick up what you feel like it? Or...shock---horror...do you not have any UFOs? *grins*
Friday, May 11, 2012
I know, I know.....
...I was going to work on mostly UFOs this year. But a girl cannot live on UFOs alone....right???

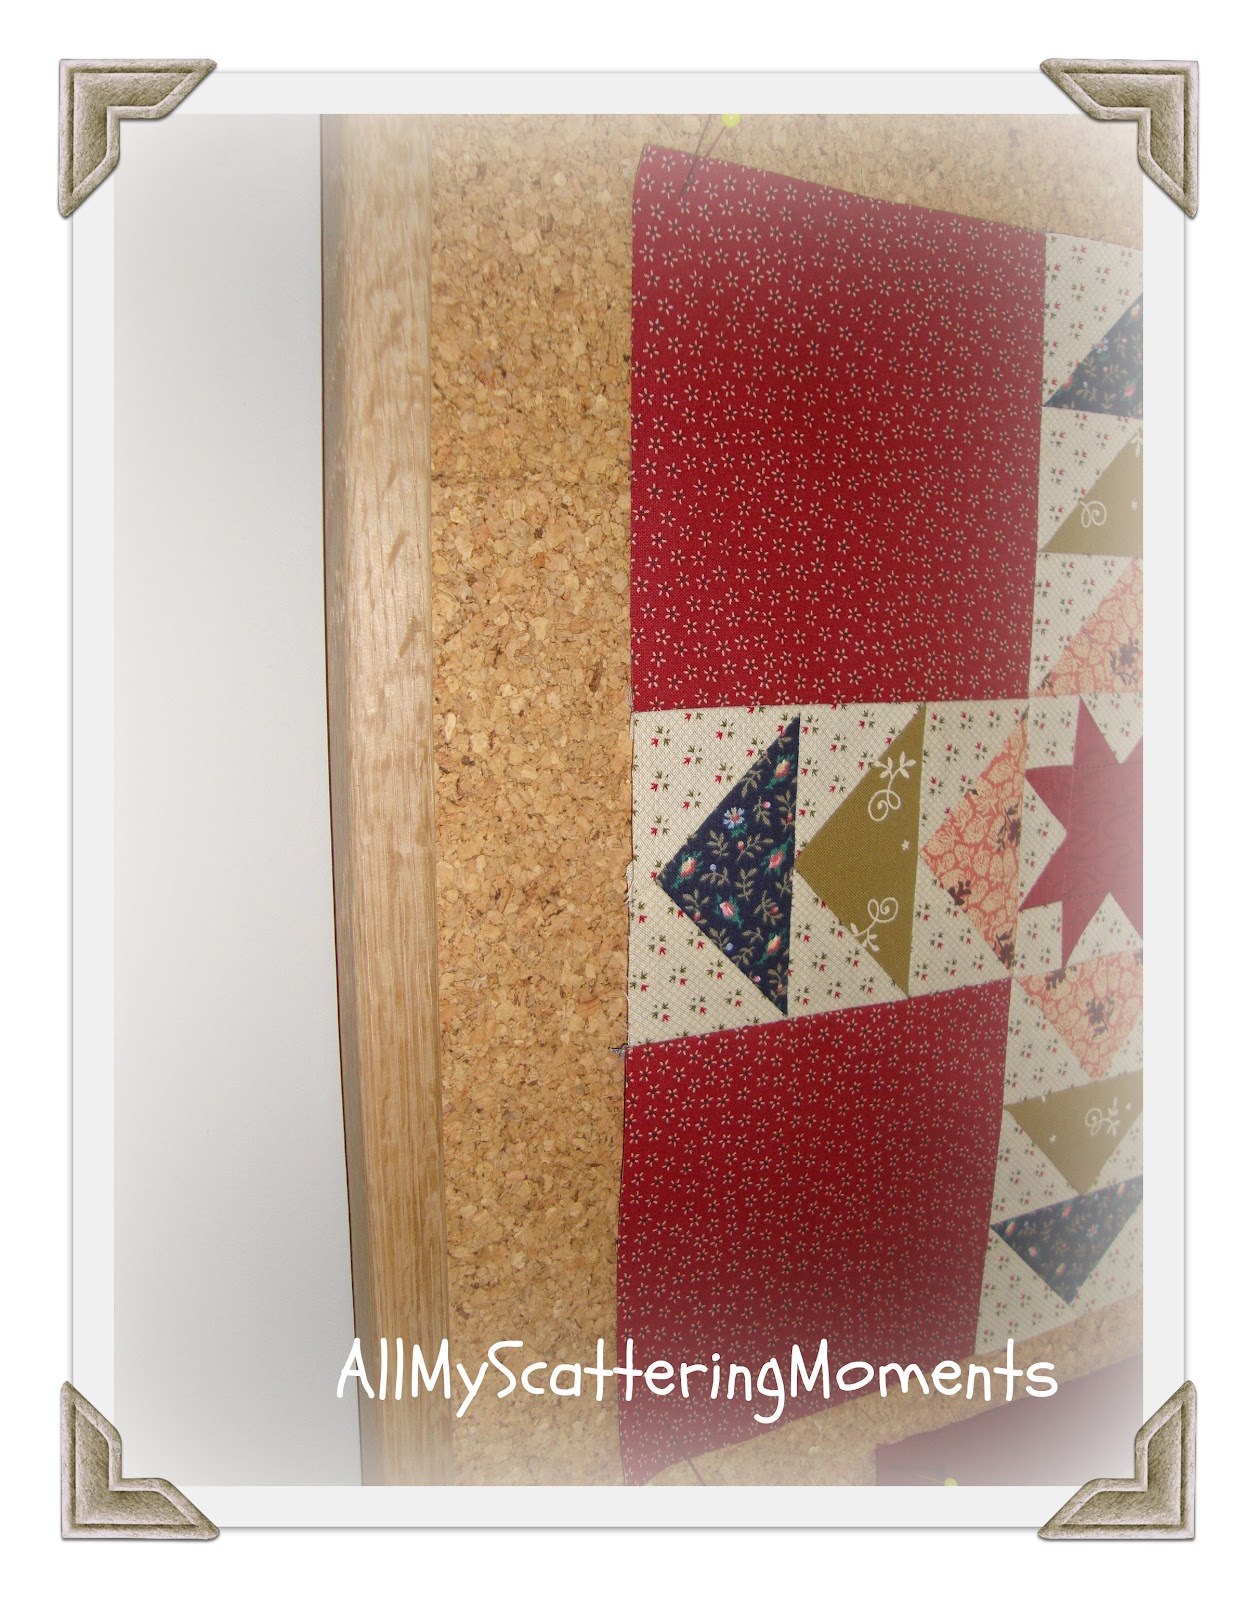
A couple of months ago, Jos hung my old huge cork board in my quilt studio. I was not sure I was going to use it in this house but decided I did have a wall big enough for it. It has quickly attracted a number of fun new quilt projects. More about the two doll quilts later. *grins*

Since my quilt studio is now downstairs in our new home right off the living room, I wanted the cork board to look nicer. Jos added an oak edging to it to give it a finished look. I just love it now!
Did you notice the project hanging at the bottom of the cork board?

I had been carrying the patterns for this cute stitchery quilt in my folder with my newsletters for my quilt group all this year. Not a good idea! When you see them constantly, it is hard to resist starting on them. But start I did and today just put the last touches on the quilt up to this point.
You can find these free patterns for Visions of Christmas here.


I am however still working away on a UFO which is being hand quilted. I have now been diagnosed with Raynaud's disease in my hand and it has been painful for over a month now. I am luckily left handed but still need the right for my needlework. This are slow but steady. I do hope to get a couple of finishes done by the end of May regardless. Wish me luck!?!

A couple of months ago, Jos hung my old huge cork board in my quilt studio. I was not sure I was going to use it in this house but decided I did have a wall big enough for it. It has quickly attracted a number of fun new quilt projects. More about the two doll quilts later. *grins*
Since my quilt studio is now downstairs in our new home right off the living room, I wanted the cork board to look nicer. Jos added an oak edging to it to give it a finished look. I just love it now!
Did you notice the project hanging at the bottom of the cork board?

I had been carrying the patterns for this cute stitchery quilt in my folder with my newsletters for my quilt group all this year. Not a good idea! When you see them constantly, it is hard to resist starting on them. But start I did and today just put the last touches on the quilt up to this point.
You can find these free patterns for Visions of Christmas here.

It is full of fun patterns like snowmen, nutcrackers, Santa, stockings, angels, gingerbread men and a little red wagon. Well...I made it into a little red wagon and added the Radio Flyer logo. You can enlarge the photos to see more details. What little kid in the US did not want a Radio Flyer wagon when they were growing up. Since I am in my second childhood, I asked my step father to get one of these cars so I could come home and drive it. For some reason he said no....lol. Take a look at this video of a couple in Alaska that have one.....
How neat is that? I bet it would stop traffic everywhere.
So now I have to decide on what I want to do with the pieced border so I can get this top ready to start quilting. I am using all woven homespun fabrics for this quilt to give it a primitive country look.

I am however still working away on a UFO which is being hand quilted. I have now been diagnosed with Raynaud's disease in my hand and it has been painful for over a month now. I am luckily left handed but still need the right for my needlework. This are slow but steady. I do hope to get a couple of finishes done by the end of May regardless. Wish me luck!?!
Tuesday, May 1, 2012
A Woman's Strength and Courage
This past week, I happened to be looking for free daily offers on my Kindle and came across this children's book called Martha Ann's Quilt for Queen Victoria. I love quilt based fiction for any age.
Last night, I decided to read it before I went to bed. I was touched by this story that I woke up this morning and immediately started looking for information. As a quilter, when I read at the end of the story that it was based on a real woman's life and the quilt existed, I had to see if I could find a photo of the Coffee Tree quilt.

This is Martha Ann Ricks. This photo is part of the collection taken at the National Portrait Gallery in London. It was taken on July 18, 1892. Her eyes and smile tell a story in themselves.

This is the Coffee Quilt which she stitched by hand for Queen Victoria. It was made with affection and conviction for the queen. She herself was quoted in The London Times saying...'The Lord told me I should see the Queen, and I know I will.' She hand appliqued more than 300 green leaves with red coffee berries.
Excerpt from Martha Erskine Ricks: 19th Century Quiltmaker by Hicks...
**The Coffee Tree Quilt Mrs. Ricks designed had over 300 pointed green leaves with plump red coffee berries all delicately hand-appliquéd onto a white background. The quilt was composed of a center tree trunk extending the length of the quilt. Mrs. Ricks divided the background into four quadrants with a main branch in each quadrant attached to the center trunk. Dozens of leaves with coffee berries attached to minor branches in each of the quadrants. Scalloped appliquéd leaves and berries bordered the entire tree. She most likely spun, wove and dyed her own cloth using both cotton and fibers from the silk cotton tree. The size of the quilt was at least as large as our present-day queen-size quilts.**

I found this version of the quilt from the story Kyra Hicks wrote on her blog. Isn't it beautiful! Thank you so much Kyra for sharing this inspiring story with the world through your book. Martha Ann has really touched my soul.

Normally, I use my book and food blog to write a book review but I just had to share this book with you. It is such an inspiration to any woman who sews, quilts or stitches. I will be quilting today with Martha Ann in my thoughts and a feeling that I am linked to her and all woman who worked magic with their needle and thread before them and draw on their strength and courage.
Personal note: I have been neglecting my blogs as I have not been feeling well. I had to go into the hospital over Easter and am not totally recovered yet. Rather than write it all out, you can read about it on my home and garden blog here. I find myself in bed at 7pm some evenings totally worn out. The specialist just talked to me this morning about my test results and it appears that my immune system just went on tilt which is something they cannot explain. It is not a result of anything I ate. I have an emergency kit with 4 medications to take if it happens again before I call an ambulance. I think I have a nerve infection in my right hand also which is causing me major discomfort for the last two weeks so my needlework is coming more slowly at the moment. I am left handed though and grateful that I still can do things. I do have some works in progress to share so hope to get to some of them on my next blog post.
Last night, I decided to read it before I went to bed. I was touched by this story that I woke up this morning and immediately started looking for information. As a quilter, when I read at the end of the story that it was based on a real woman's life and the quilt existed, I had to see if I could find a photo of the Coffee Tree quilt.
This is Martha Ann Ricks. This photo is part of the collection taken at the National Portrait Gallery in London. It was taken on July 18, 1892. Her eyes and smile tell a story in themselves.
This is the Coffee Quilt which she stitched by hand for Queen Victoria. It was made with affection and conviction for the queen. She herself was quoted in The London Times saying...'The Lord told me I should see the Queen, and I know I will.' She hand appliqued more than 300 green leaves with red coffee berries.
Excerpt from Martha Erskine Ricks: 19th Century Quiltmaker by Hicks...
**The Coffee Tree Quilt Mrs. Ricks designed had over 300 pointed green leaves with plump red coffee berries all delicately hand-appliquéd onto a white background. The quilt was composed of a center tree trunk extending the length of the quilt. Mrs. Ricks divided the background into four quadrants with a main branch in each quadrant attached to the center trunk. Dozens of leaves with coffee berries attached to minor branches in each of the quadrants. Scalloped appliquéd leaves and berries bordered the entire tree. She most likely spun, wove and dyed her own cloth using both cotton and fibers from the silk cotton tree. The size of the quilt was at least as large as our present-day queen-size quilts.**
I found this version of the quilt from the story Kyra Hicks wrote on her blog. Isn't it beautiful! Thank you so much Kyra for sharing this inspiring story with the world through your book. Martha Ann has really touched my soul.
Normally, I use my book and food blog to write a book review but I just had to share this book with you. It is such an inspiration to any woman who sews, quilts or stitches. I will be quilting today with Martha Ann in my thoughts and a feeling that I am linked to her and all woman who worked magic with their needle and thread before them and draw on their strength and courage.
Personal note: I have been neglecting my blogs as I have not been feeling well. I had to go into the hospital over Easter and am not totally recovered yet. Rather than write it all out, you can read about it on my home and garden blog here. I find myself in bed at 7pm some evenings totally worn out. The specialist just talked to me this morning about my test results and it appears that my immune system just went on tilt which is something they cannot explain. It is not a result of anything I ate. I have an emergency kit with 4 medications to take if it happens again before I call an ambulance. I think I have a nerve infection in my right hand also which is causing me major discomfort for the last two weeks so my needlework is coming more slowly at the moment. I am left handed though and grateful that I still can do things. I do have some works in progress to share so hope to get to some of them on my next blog post.
Saturday, March 31, 2012
Looking forward to summer?
Well, not really looking forward to summer already but I finished another UFO! This is a SAL that I did back in 2010 from Sofie's blog. I loved the lacy simplicity of this design.

But it was round and I could not decide what I wanted to do with it. A couple of weekends ago, we left for Cranberry Cottage on Friday morning so I asked Jos if we could stop in at a shop I like in Staphorst. I knew this sampler was sitting in a stack waiting for attention but was not looking for anything for it. When you least expect it, there it is...the solution.

I found a round candle tray that I was thinking would be about the right size for this sampler. I cut a piece of poster board in a circle to fit inside the tray and glued a couple of layers of quilt batting to it. Then I stretched the sampler over the poster board and laced it after which I simply glued it into the tray. A piece of lace glued around the edge finished it off just right.

So far, I have finished 13 projects this year of which 6 were on my UFO list. I am really pleased with how many I am finishing so have been adding more UFOs to the list. I hope I can keep up the momentum.....
Anyone else working this year on UFOs?
Thursday, March 29, 2012
Rabbit season.....
When I came across the Mosey'n Me free chart called Hare's Another Rabbit on Patty's blog, I loved it. Then I saw it again at Miss Linda Lee's and that was it...I had to make this one for Easter.

I decided to work on it while I was online talking to my mother each evening on Skype. I figured I would be able to finish it easily on time since we talk for at least an hour each day.

I already had decided that it would look adorable in a frame I had bought to paint and use for my Dagi sampler wall. I will just look for another frame later for those cat samplers. This frame was just too perfect for this little rabbit picture.

I used 30ct. Apple Brown Bindy R&R Linen for this one stitching 2 over 2. My eyes need a rest. Then I used Crescent Colours Roasted Chestnut to create a milk chocolate bunny. You see, I only eat dark chocolate so this will prevent me from biting his cute little ears off. Then I used Carrie's Creations floss Olives to create the little gingham border on two sides of the design. That was just a little deviation on the original design to work well in my frame.
So that's it...rabbit season has begun! Just in case you are not in a holiday mood for Easter here is Peter Cottontail which I played over and over to drive my mother nuts with. *grins*
Note: I am so sad that I am not able to comment on any WordPress blogs. It refuses my comment until I sign in but I am not a WordPress member. I hope this problem is solved soon but wanted to let people like Lillian, Amy and Barbara know that I am not able to comment. Is anyone else having this problem?
Tuesday, March 27, 2012
Little Red Riding Hood.....
Long, long ago...a little girl used to ring the doorbell. Her mother would answer and ask who's there. The little girl would always be someone different but her first choice was always Little Red Riding Hood. No matter how many times the little girl rang the doorbell, the mother would come open the door and ask who she was...

Yes, you guessed it...I am Little Red Riding Hood. *wink* So anything with this on it is special to my mother and I. My mother gave me this pretty picture one Christmas. Her Little Red Riding Hood at the door. So when I was at a big indoor fabric market and found some children's fabric with Little Red Riding Hood on it, I knew I had to get some and make a birthday gift for me mother.

I decided on a fabric basket to hold her knitting. I took the measurements from this tutorial and the instructions from this tutorial to sew the basket.

In working with this method, you end up with four corner squares of fabric from the fabric and lining leftover. Rather than waste this fabric, I sewed these pieces together and created a small basket to match the large one. I sewed the method from the tutorial I used for the measurements since she does hers in 5 pieces for the basket which is what I had left from the large basket adding one extra square from the fabric I had left. Clear as mud? *grins* I got two basket out of a half meter of fabric and still have a fat quarter left for something else.

They were fun to sew and easy to follow the tutorials. A great way to make a project basket for knitting, crocheting, stitching or quilting.

Happy birthday again Mom from Little Red Riding Hood!
Saturday, March 24, 2012
An Easter themed SAL Day...
Why Easter themed? Because Peter Cottontail came along and presided over the table...
 Each time Bep comes for our stitch-along day, I give her a table present. This time I set the table with a yellow tablerunner and my cabbage leaf plates. This sweet bunny and a pretty green glass for her garden table were awaiting Bep. She surprised me with a pretty garden pot filled with tiny wood violets. I just love it and it looks perfect out on my garden table. Thanks Bep!

But we were here to work too! First we worked on a wedding quilt that Bep is making but since it is a surprise, I cannot show it that. She asked me to show her how I attach binding to a quilt. By lunchtime, it was on and she simply had to sew the back at home.
We enjoyed coffee and a lemon cream muffin. Then we got our stitching for the strawberry pincushions cut and interfacing ironed on. We picked out little beads to sew on before we put them together. Funny but when you start to pick out beads, you can end up with ones that you totally do not expect to want to use. We both decided on our beads and are sewing them on now. Sewing the pincushions will wait until the next SAL...

But that table was calling so we toasted to our lunch and friendship with a glass of Chardonnay and tucked in...

The theme was appetizers and finger foods...

Bep prepared Belgian endive leaves filled with scrambled eggs with red peppers and onion, mini pizzas and boiled eggs with anchovies on toast. I made real tartar sauce with English cod nuggets, grilled herb tomatoes and deviled eggs.
I am already looking forward to our next SAL day. *sigh*
Tuesday, March 20, 2012
Hermit doing the moonwalk.....
That was me this weekend. It was the March hermit weekend. First I forgot to add my link to the list before it was too late. Then I started my stitching tucked up in Cranberry Cottage for a nice long weekend. Sounds like all was in place for a great weekend of needle and thread? I started my moonwalk (remember that move by Micheal Jackson) on Friday afternoon. I needed to finish off the last bits of this project...

As easy as it is, I had to restitch the initials 3 times and the date twice to get it right. Tomorrow, Bep and I have our monthly SAL day and will start the next step of our strawberry pincushions. This stitching was just the start.
Then I pulled out this old UFO. Now I love this piece but it got set aside when I needed to work on stitching ort jars for my quilt group's Christmas in July party last year. Not so good as it stayed there until now. In the theme of stitching UFOs, this was going to be next on my list. Oh my! Thankfully I did not take along the quilt I am quilting as I would have set this aside again and quilted. I had a terrible time with seeing what I was doing and there making mistakes. I also did not like a color I was using and frogged the flower to change it to the pink. I also forgot to take photos of where I started at the beginning of the weekend but you will have to take my word for it that I filled in the heart at the top right and started on the keys next to the heart.
I never have trouble with small count doing 1/1. This one is not even all that small at 30 stitches per inch. I love working something so that it is little and delicate but I did not used to have this silly eye disease which is plaguing my being able to focus properly. After working on this on and off since Friday, I put it aside on Monday evening and could feel my eyes were very irritated. I woke up this morning at 3:44am to a full blown attack and having to get up to take some pain medication. I refuse to give up on this UFO though! It will get done but I need to pace myself a little more on it maybe...
.JPG)
We sometimes have our moonwalker moments as stitchers when you end up stitching more backwards than forwards. I am hoping next month will go a little smoother for my next hermit weekend...
In the meantime, maybe I should just try and catch the moon while listening to Elizabeth Mitchell (just love Elizabeth Mitchell and listen to her in my quilt studio all the time...) sing with Lisa Loeb...
Tuesday, March 6, 2012
DagiLuv - cat sampler wall
Hurrah...another finish...another UFO crossed off my list...

DagiLuv is framed and hanging on the cat sampler wall as of today! I had started this project back at the beginning of 2011 with the idea of stitching all 10 of the patterns from The Goode Housewife in that same year and a further 2 cat patterns. That was a bit over ambitious so I am pacing myself with the idea of finishing the wall in 2013. So my UFO goal for this year is to stitch a further 4 of the samplers. This sampler brought my total up to 6.
.JPG)
I christened this sampler called MayBelle by the designer as DagiLuv. If you remember, I am changing the colors of the cats to look like Dagi, our beloved four footer. The cat was stitched in DMC 3782 and 3790. I also used colors 830 and 834 which are the advised colors but changed to 3776 since I had it in my stash and 844 as I felt the dark grey color would look nicer with the frame since it was black. Black would have been too heavy with the thread color.

I found a perfect square frame again so did a little rework on hanging them and now can on kitting up a square design again. I was so happy to find this one as it is the bronze color which I am using here and there to ensure the look of the sampler wall is not too heavy. And can you spy my little addition? I added a springerle cookie mold that I bought years ago in The Alsace, France. I could not resist as it comes out so nicely between all the needlework while it did not show up as well with my speculaas cookie form collection being small.
Do you remember this pincushion from my old blog?

It has been featured on Ashlie's blog for her Truly Talented Tutorial Thursdays. I was really honored that she included it. You can see it here and follow the photo to link to my tutorial on NeedleNecessities.

DagiLuv is framed and hanging on the cat sampler wall as of today! I had started this project back at the beginning of 2011 with the idea of stitching all 10 of the patterns from The Goode Housewife in that same year and a further 2 cat patterns. That was a bit over ambitious so I am pacing myself with the idea of finishing the wall in 2013. So my UFO goal for this year is to stitch a further 4 of the samplers. This sampler brought my total up to 6.
.JPG)
I christened this sampler called MayBelle by the designer as DagiLuv. If you remember, I am changing the colors of the cats to look like Dagi, our beloved four footer. The cat was stitched in DMC 3782 and 3790. I also used colors 830 and 834 which are the advised colors but changed to 3776 since I had it in my stash and 844 as I felt the dark grey color would look nicer with the frame since it was black. Black would have been too heavy with the thread color.

I found a perfect square frame again so did a little rework on hanging them and now can on kitting up a square design again. I was so happy to find this one as it is the bronze color which I am using here and there to ensure the look of the sampler wall is not too heavy. And can you spy my little addition? I added a springerle cookie mold that I bought years ago in The Alsace, France. I could not resist as it comes out so nicely between all the needlework while it did not show up as well with my speculaas cookie form collection being small.
Do you remember this pincushion from my old blog?
It has been featured on Ashlie's blog for her Truly Talented Tutorial Thursdays. I was really honored that she included it. You can see it here and follow the photo to link to my tutorial on NeedleNecessities.
Wednesday, February 29, 2012
Leaping along.....
It is Leap Year and we have an extra day today. What better to do with that day that work on some projects?
This UFO challenge for 2012 has become very easy. So far I have completed 4 UFOs and have been adding more to my list. It is addictive to grab the next UFO and get busy with it.
I finished piecing this quilt top and am sandwiching it today. I have not decided yet if I want to machine quilt it. I have been wanting to do one again by machine to practice but I do love hand quilting. I figure by the time I have it sandwiched, I will be able to decide. As you see, Dagi has decided to model the quilt top for you...

My stitching UFO project of the cat samplers is moving along with DagiLuv. It is a fun design and coming along nicely.

What are you doing with your extra day today?
This UFO challenge for 2012 has become very easy. So far I have completed 4 UFOs and have been adding more to my list. It is addictive to grab the next UFO and get busy with it.
I finished piecing this quilt top and am sandwiching it today. I have not decided yet if I want to machine quilt it. I have been wanting to do one again by machine to practice but I do love hand quilting. I figure by the time I have it sandwiched, I will be able to decide. As you see, Dagi has decided to model the quilt top for you...

My stitching UFO project of the cat samplers is moving along with DagiLuv. It is a fun design and coming along nicely.

Sunday, February 26, 2012
Shoe mat: One day project tutorial
This past Wednesday, I went out for a day of shopping and lunch with quilting friends Bep and Mieke. We stopped into a couple of shops to look at what yarn they had.

For some time, I have had an idea of trying to make a shoe mat (no more wet shoes on my wood floor) for my hallway but needed really chunky yarn which I found that afternoon. I got started on Thursday afternoon and by that same evening, my mat was done. It was fun to have a quick project which gives you instant gratification.


I wanted my mat to be wide enough to set Jos' big old and much beloved Cat boots on top and wide enough for under my coat rack. You could adjust your pattern for whatever size will work right for you. It is so fun and easy to make so why not try one. If you cannot find chunky yarn, you could use 2 or 3 strands of yarn crocheted together.

And now I am off to dig into my seasonal decorations for my St. Patrick's Day bowl fillers. Did you notice that empty dough bowl? *grins*

For some time, I have had an idea of trying to make a shoe mat (no more wet shoes on my wood floor) for my hallway but needed really chunky yarn which I found that afternoon. I got started on Thursday afternoon and by that same evening, my mat was done. It was fun to have a quick project which gives you instant gratification.

You need very chunky yarn (I used 5 balls of 100g each) and a 15mm (I think that is size S) crochet hook. Chain enough to make the foundation of your mat as wide as you would like it. I chained 22. Then chain 2 extra which is your first single crochet. Now crochet in each chain for a total of 22 single crochet. Chain 2 and turn. Single crochet 22 using only the back loop of the previous row of sc. Chain 2 and turn and repeat rows until the mat is the length you desire.
For the border, single crochet around the entire mat. I made sure I created 2 sc per row I had crocheted. Now starting at a corner, chain 3 which is your first double crochet. Make 4 double crochet in the same stitch as the ch 3. Skip next sc and sc in the next stitch. Skip next sc and make 5 dc in the next stitch. Continue around the mat and end by makiing a slip stitch in the 3rd chain of the beginning stitch.

I wanted my mat to be wide enough to set Jos' big old and much beloved Cat boots on top and wide enough for under my coat rack. You could adjust your pattern for whatever size will work right for you. It is so fun and easy to make so why not try one. If you cannot find chunky yarn, you could use 2 or 3 strands of yarn crocheted together.

And now I am off to dig into my seasonal decorations for my St. Patrick's Day bowl fillers. Did you notice that empty dough bowl? *grins*
Friday, February 24, 2012
Granny...imperfection but still happy dancing!
This working away on UFOs is really becoming fun and addictive. I am enjoying seeing things get finished. My latest finish is my granny square throw...

The problem with some UFOs is that you have to remember what you were doing where you left off. This was going to be a nice large afghan but turned into a throw when I discovered I made a huge beginners mistake.


So until that post, have a really wonderful and creative weekend!


But the good thing about making a mistake is that you can learn a lesson. If you enlarge the photo above you might be able to see the mistake. I had been merrily making my granny squares and, when I finished the next 20, started sewing them together. But they did not fit on the previous squares or look right. I kept trying to figure out what I did as the actual granny rounds were exactly the right size. Then I saw what I did! I had done a round of single crochet to each and every square before I sewed them together in the previous squares. I just sewed them on and started working on a more elaborate border.

Lesson learned...always jot down what you are doing on a piece of paper and put it in your project basket. In the meantime, I thought it was a good piece to practice playing with ideas for a border. I just made it up as I went along. It too is not perfect but this is going to be a throw to be well used with all its "wonkiness" and imperfections.

Yet another UFO is off my list and that feels great. I have another crochet finish to share but I will save that for my next post. You see, I do have new starts every so often but this was a one day project as a reward for having finished this throw.

So until that post, have a really wonderful and creative weekend!
Monday, February 20, 2012
I'm a stitchin' hermit!
My first stitchin' hermit weekend was fun. And yes Barbara...I am a natural hermit. Jos will not move to the country as he thinks it would feed this urge of mine to be a hermit. *sigh* I keep threatening him that I will run away to the Shetland Islands one day where I can really be a hermit. *grins*

Now as a hermit, I think I am entitled to feline friendship in the form of my little old man Dagi. In fact, I dedicated my hermit weekends to him even though he spent it snoozing as you can see. I am going to use these weekends to work on more of my Dagi cat sampler wall. High time too since I looked up my last entry about this project and it was back in September. Yikes!

As with all the samplers, I changed the cat's colors to Dagi's color. This design is called MayBelle but I am rechristening it DagiLuv.

Dagi is very old for his breed of cat at 14 years and is showing signs that life is coming to an end. It breaks our hearts to think he will not be here one day but we have been very fortunate that he picked us to live with (and boss around...lol) so making a sampler wall dedicated to him just seemed natural to me. I think he likes it to since he spent most of my hermit weekend on my lap. *wink*
If you want to join up or simply see more hermits, follow the link here to Joyce's blog.
Subscribe to:
Posts (Atom)